Creating a StudyTRAX Service Account
- Leslie
- John Paliwoda
Owned by Leslie
Last updated: Aug 21, 2013 by John PaliwodaVersion comment
Overview
This page describes how to setup a service account for StudyTRAX. It is beyond the scope of this document to describe how to create domain accounts. The steps described here will create a local account on the server that can be used to run the application. This account is used for the following:
- Connecting to the Database using Integrated Security
- Credentials used to write to the Logs (The directory StudyTRAX stores its logs in) directory
- Credentials used to write to the Temp (The directory StudyTRAX stores temporary files in) directory
If your database server is located on a different machine than the web server, you must use a domain account or create the same local user account with the same password on both machines.
Instructions
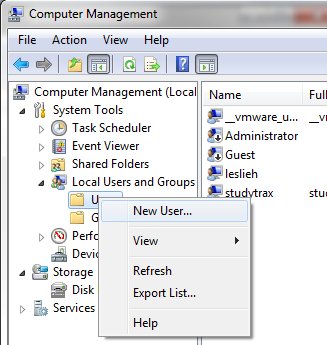
- Run the "Computer Management" application (Control Panel -> Administrative Tools -> Computer Management)
- Expand the "Local Users and Groups" item.
- Right click on the "Users" item and select "New User"
- On the dialog that comes up, enter "studytrax" (or whatever you want to call your service account) in the "User name" field.
- Enter "StudyTRAX Service" in the "Full name" field.
- Enter "The service account for the StudyTRAX application." for the "Description" field.
- Enter the password to use for the account.
- Uncheck the "User must change password at next logon" checkbox.
- Check the "User cannot change password" checkbox.
- Check the "Password never expires" checkbox.
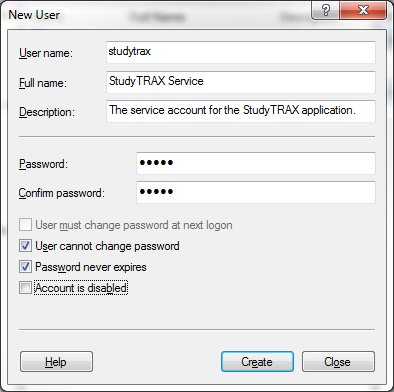
- Click the "Create" button to create the account.
Now that the service account is created, this can be used for the credentials for the application pool.
, multiple selections available,